First steps with the Microchip PIC32
Ethernet Starter Kit (DM320004)
I received this Ethernet Starter Kit
from
Farnell for evaluation. The kit is available with
order
code 1778059 from Farnell.
You can find more Microchip development kits and tools
at this link.
The kit contains a development board with a 32-bit MIPS4k
PIC32 microcontroller, a 10/100 Ethernet port, an on-board debugger and
programmer, and an OTG USB port. You can get the User's Guide and code
examples from the
Microchip
ESK page. Microchip has a software library collection for their
line of PIC16/PIC18/PIC24/PIC32 microcontrollers called "
Microchip
Application Libraries" or MAL. This collection includes the TCP/IP
stack the kit uses.
The second part of this article can be read
here.
Table of contents
The environment
I used my
Fedora 14 Linux desktop for
building these projects.
First, make sure you have a working Java environment. If you don't yet
have it, you can download it from
Oracle.
Do not use Java SE 7 or the 64-bit version. If you are not sure which download to choose, download and install the
Java SE 6 (update 29) JRE, 32-bit version. Verify:
$ java -version
java version "1.6.0_19"
Java(TM) SE Runtime Environment (build 1.6.0_19-b04)
Java HotSpot(TM) Server VM (build 16.2-b04, mixed mode)
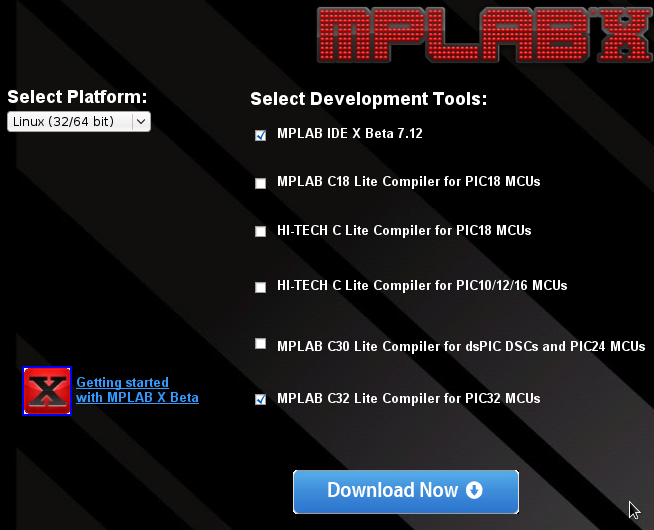
Download and install the MPLAB-X development environment and the C32 C compiler from
Microchip.
These installations require root. I did not like this, and installed as
a user and fakeroot, so that I can know of what exactly the installer
does to my desktop system. I did not document this process, sorry.
Install MPLAB-X:
# chmod +x mplabx-ide-beta7.12-linux-installer.run
# ./mplabx-ide-beta7.12-linux-installer.run
Install C32:
# chmod +x mplabc32-v2.01-linux-installer.run
# ./mplabc32-v2.01-linux-installer.run
At least C32 version v1.12 is required (I use v2.01), because earlier
versions do not include ultoa in libc.
C32 is based on gcc, which is a GPL-licensed compiler. Because of this
license, the source code of this compiler is available for download
from Microchip at
http://www.microchip.com/c32,
"GCC Source Code"
Download the ESK TCPIP demo from the
Microchip
ESK page. Now, Microchip has the lame attitude of only thinking
about Windows users. Surprise, the TCP/IP demo archive is shipped as an
EXE file. You will need the wine package to be able to extract the
contents. Under fedora, you can type "yum install wine" and have it.
Extract the TCPIP demo:
cd ~/.wine/drive_c
unzip PIC32_ESK_TCPIP_Demo_042611.zip
wine 'PIC32 ESK TCPIP Demo_042611.exe'
The contents of the archive will be extracted to the directory
~/.wine/drive_c/PIC32 ESK TCPIP Demo_042611.
Programming the
board, the easiest way
Connect the board to the PC using the
miniUSB port and cable. You should find the device in the lsusb output
with ID 04d8:00e0:
$ lsusb
Bus 004 Device 001: ID 1d6b:0003 Linux Foundation 3.0 root hub
Bus 003 Device 001: ID 1d6b:0002 Linux Foundation 2.0 root hub
Bus 002 Device 003: ID 058f:6362 Alcor Micro Corp. Flash Card Reader/Writer
Bus 002 Device 002: ID 8087:0024 Intel Corp. Integrated Rate Matching Hub
Bus 002 Device 001: ID 1d6b:0002 Linux Foundation 2.0 root hub
Bus 001 Device 009: ID 04d8:00e0 Microchip Technology, Inc. PIC32 Starter Board
Bus 001 Device 004: ID 046d:c018 Logitech, Inc. Optical Wheel Mouse
Bus 001 Device 002: ID 8087:0024 Intel Corp. Integrated Rate Matching Hub
Bus 001 Device 001: ID 1d6b:0002 Linux Foundation 2.0 root hub
Before you can use the board, it needs the firmware uploaded into it.
My kit came with a demo firmware (Simon Says), which has no
code for ethernet. The easiest way is to use the pre-compiled HEX file
from the TCPIP demo. You will need the file "TCPIP PIC32 ETH Demo
App-C32.hex".
Open MPLAB-X, and start "File/New project". Choose "Microchip
Embedded" category, "Prebuilt" project, then "Next".
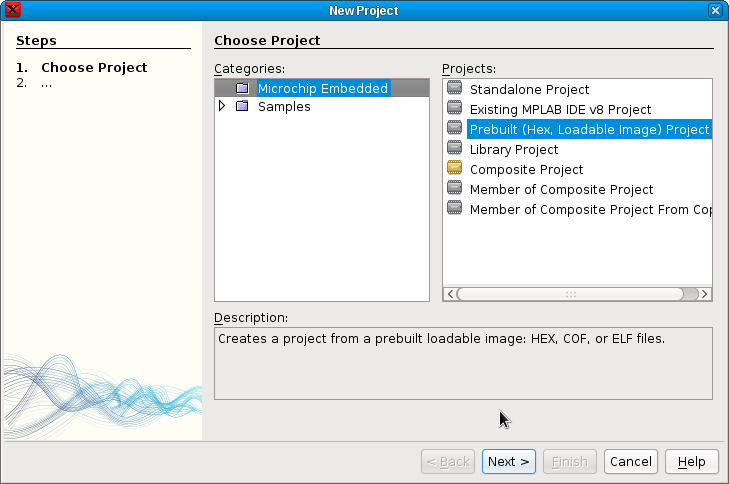
Choose the "TCPIP PIC32 ETH Demo App-C32.hex" file as the "Project
filename" then "Next". Choose PIC32MX795F512L as device, then "Next".
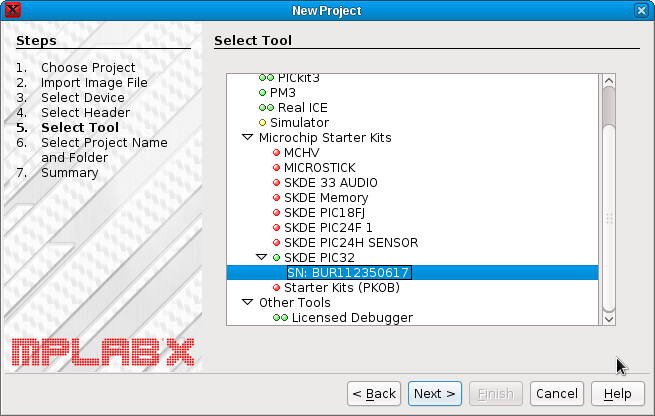
Now, if your setup is correct, the serial number for the PIC32 starter
kit debugger should appear under "SKDE PIC32". Select it, then choose
"Next".
You can accept the default names on the next screen for Project Name
and Folders. Select "Next", then "Finish".
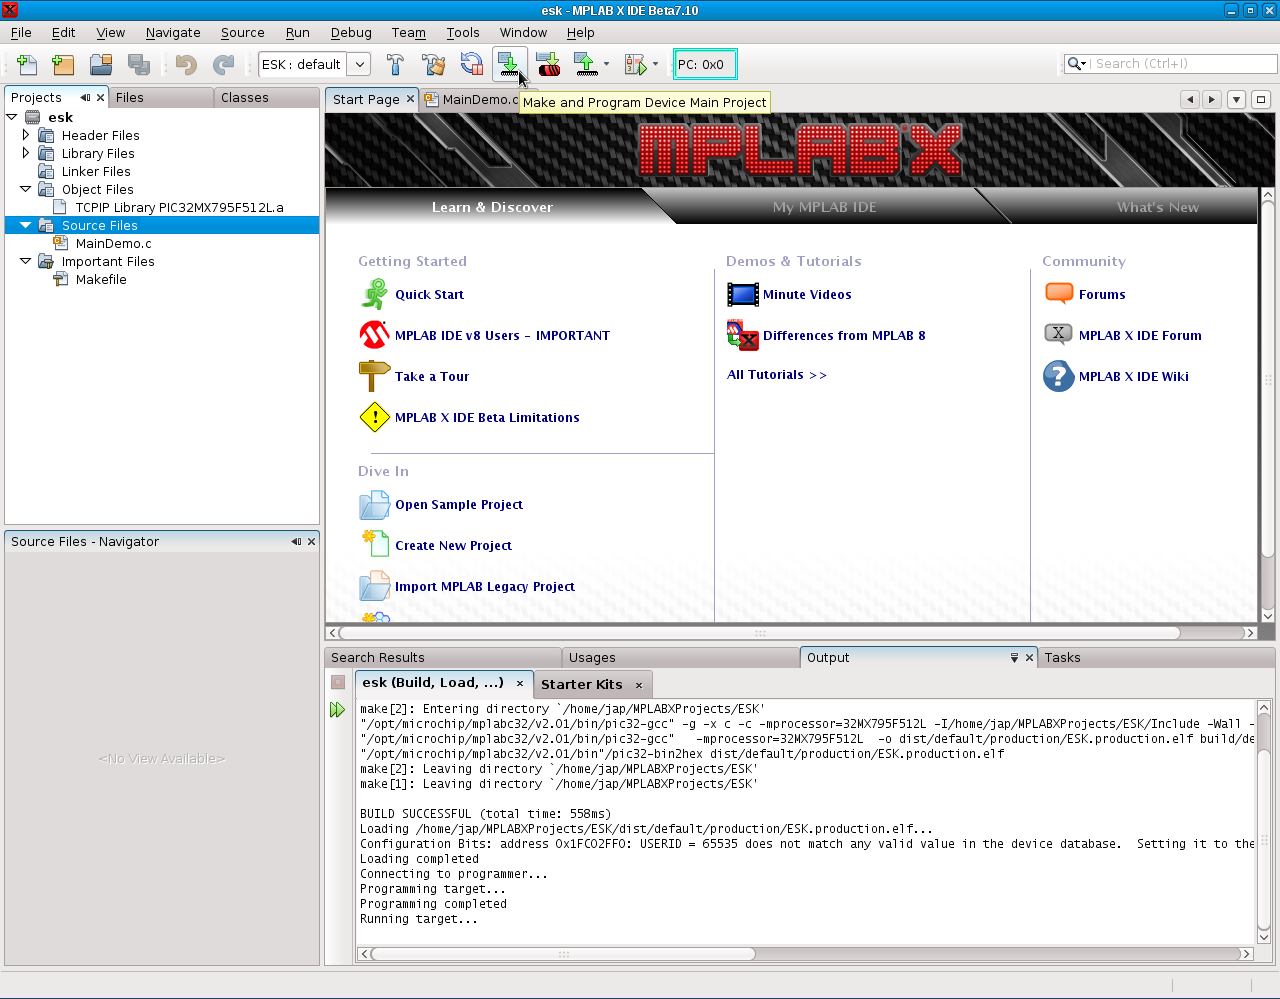
Now, just select the icon for "Make and Program Device Main Project" as
shown on the screenshot.
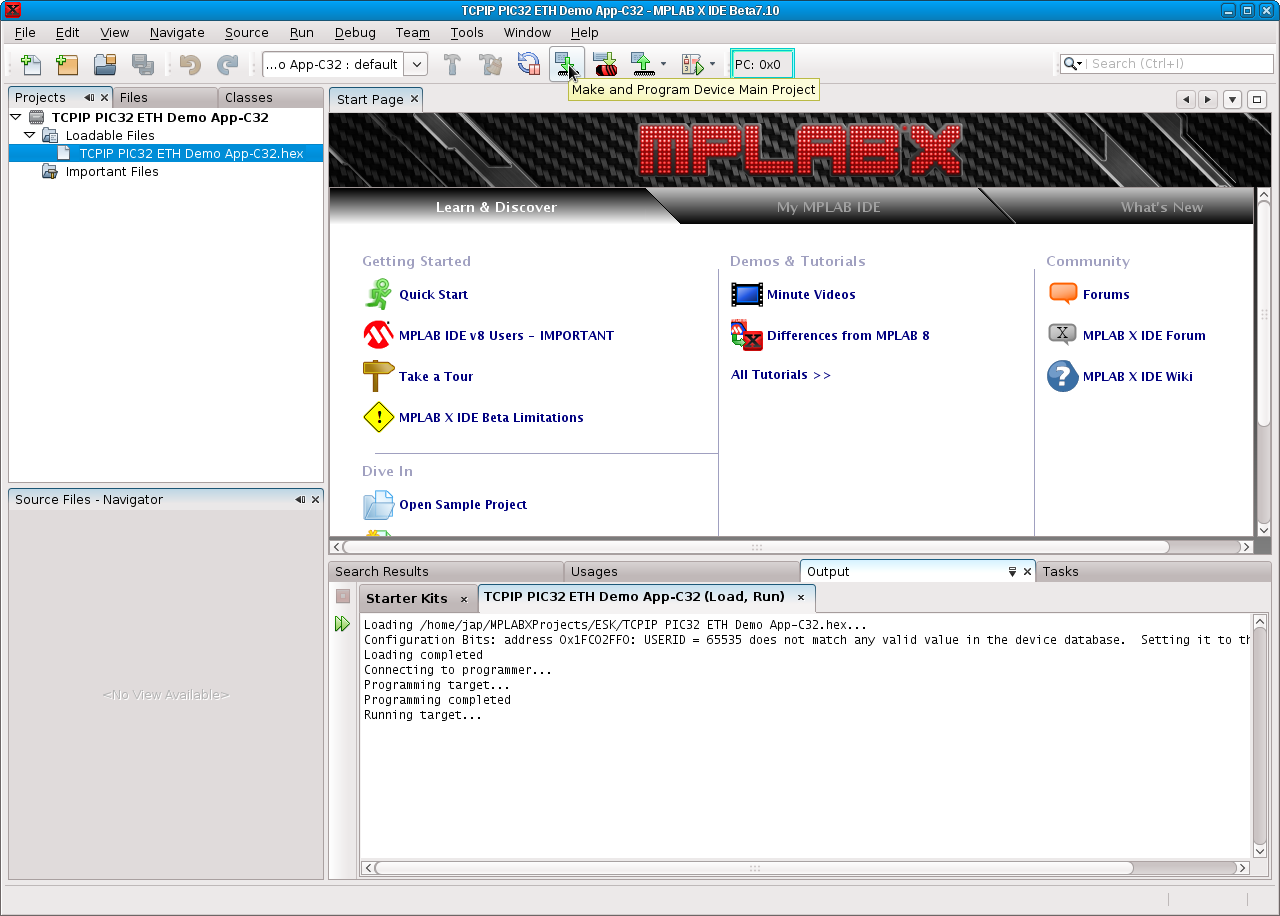
The board should now be running the TCPIP demo. It is time to connect
it to an Ethernet switch in your network. The firmware will request an
IP address and configure itself automatically. It also broadcasts on
UDP port 30303 using the "announce protocol", so you could discover it
using "MCHPDetect.exe".
Here is an example of the packet sent, as seen on my router:
root@router:~# tcpdump -i br-lan port 30303 -s 1500 -X
tcpdump: verbose output suppressed, use -v or -vv for full protocol decode
listening on br-lan, link-type EN10MB (Ethernet), capture size 1500 bytes
22:48:04.906796 IP 10.192.0.175.2860 > 255.255.255.255.30303: UDP, length 61
	0x0000:  4500 0059 e26f 0000 6411 68b6 0ac0 00af  E..Y.o..d.h.....
	0x0010:  ffff ffff 0b2c 765f 0045 a133 4d43 4850  .....,v_.E.3MCHP
	0x0020:  424f 4152 4420 2020 2020 200d 0a30 302d  BOARD........00-
	0x0030:  3034 2d41 332d 3137 2d39 392d 4330 0d0a  04-A3-17-99-C0..
	0x0040:  4448 4350 2f50 6f77 6572 2065 7665 6e74  DHCP/Power.event
	0x0050:  206f 6363 7572 7265 64                   .occurred
The documentation says you can access the board by typing
"http://mchpboard" into a browser on the computer. It may work
sometimes with routers, but not with mine, based on
Openwrt. So I had to check the DHCP
requests to find the ip address of the board manually. The address was
http://10.192.0.175 in my case, this is how the page looks:
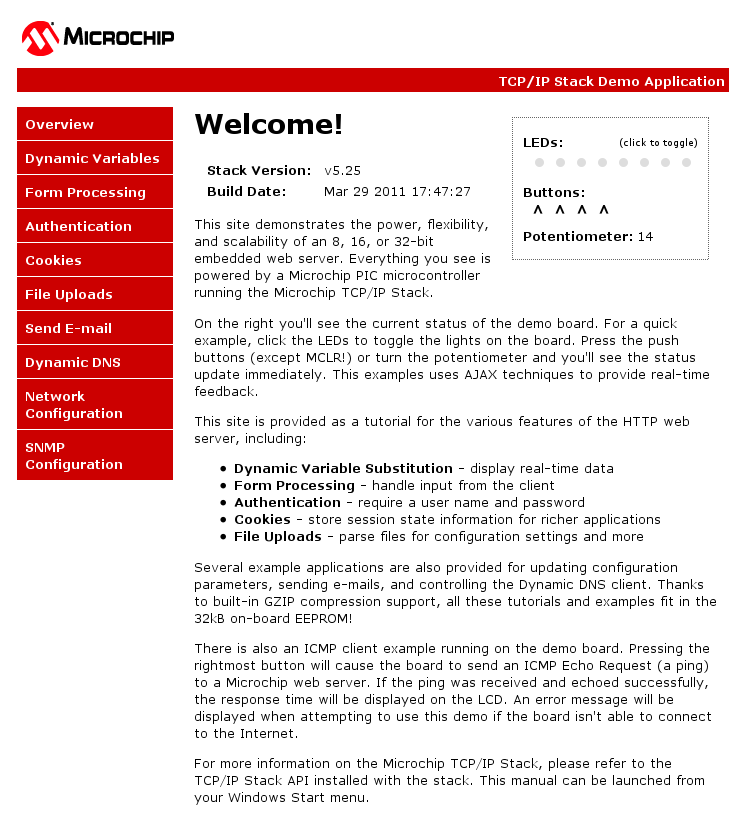
The demo page shows the states of the buttons on the board, and you can
update the LED states by clicking on them.
Compile the TCPIP
demo code
The TCPIP demo comes with a
"MainDemo.c" and the precompiled Microchip
TCPIP library. The next step is to create a project, compile the demo
source, and link it with the precompiled TCP/IP library. You can
experiment with modifications of the MainDemo.c source, but not with
the TCP/IP library settings.
The file "TCPIP Library PIC32MX795F512L.a" is the collection of
precompiled sources for the specific microcontroller and circuit setup
of the ESK board.
We can list the precompiled files from the library as: ar t
TCPIP\ Library\ PIC32MX795F512L.a
and the functions and variables with objdump -t TCPIP\ Library\
PIC32MX795F512L.a
Create a new project (File/New project), but choose "Standalone
Project" this time. Choose the PIC32MX795F512L and the PIC32 starter
kit debugger as in the previous step. Select C32 as the compiler
toolchain, and give a new name for this project. Finish the wizard,
and add "MainDemo.c" to sources
and "TCPIP Library PIC32MX795F512L.a" to object codes. This can be done
in the "Projects" window by right clicking "Source Files" and selecting
"Add Existing Item". Do the same with "Object Files".
Before compiling, there are a few steps to adjust the settings to
ensure successful compilation. Edit the project (right click the
project name and select "Properties")
and modify the settings under "pic32-gcc" and "pic32-ld":
Select pic32-gcc option categories "Errors and warnings": turn on
"Additional warnings"

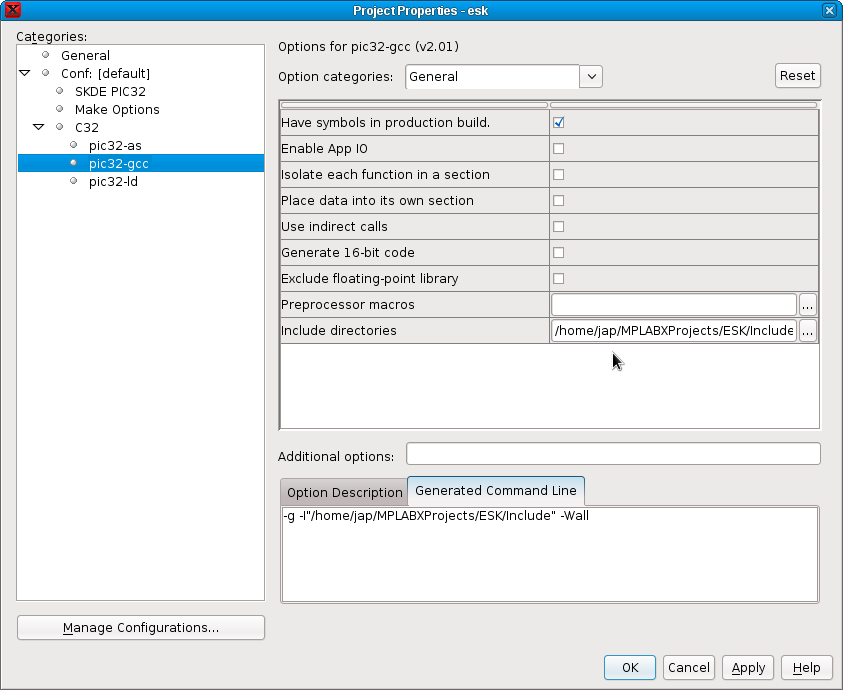
Select pic32-gcc option categories "General" and select the "Include"
directory from the TCPIP demo for "Include directories".
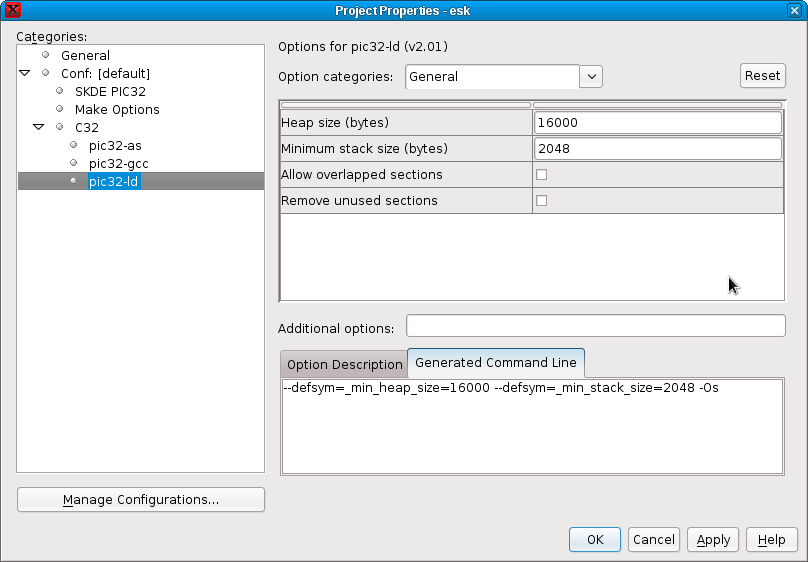
Select pic32-ld option categories "General" and modify "Heap size" to
16000 and "Minimum stack size" to 2048 as shown:
Select pic32-ld option categories "Libraries" and select
"s" for Optimization level of Standard Libraries. You are ready to
compile and program the code into the board. Select the icon for "Make and Program
Device Main Project" as in the previous step. If the firmware was
uploaded succesfully, verify that the board still operates by visiting
its URL again.
Compile the TCPIP
stack
In this step, the full firmware is
compiled from source. Thus you can experiment with customizing the
TCPIP library, eg. stripping unneeded features such as SNMP, SMTP,
upload handling, etc. For this step, we will need the Microchip
Application Libraries.
Read the details in the
second part.